Summary: After connecting Google Analytics to the WordPress website. I realized I still had no visibility into how Google actually sees my website in search results. That is when I decided to set up Google Search Console. I tried four different ways to integrate it. The first was using the Google Site Kit plugin that I already had installed for Analytics.
The second was adding the verification meta tag manually into my WordPress header.php file. The third was verifying through my existing Google Analytics connection. And the fourth involved uploading an HTML verification file directly to my website. All four worked once done correctly. This blog shares what I did, the mistakes I made, and how I finally got Search Console showing data.
If you just set up Google Analytics for your website and think you are done, you are actually only halfway there.
That was exactly where I was a few weeks ago with livegodigital.com. Google Analytics tells you who is visiting your website. Google Search Console tells you how Google is finding and reading your website. Both are different tools and both are important for anyone who wants their website to show up in Google search.
Setting up Search Console felt a little confusing at first because there are multiple ways to verify your website and I was not sure which one to pick. I also made a few mistakes along the way that I will be honest about in this blog. But once it clicked the process was actually not that hard.
This blog is based on what I personally did. If you are stuck or confused right now hopefully this helps.
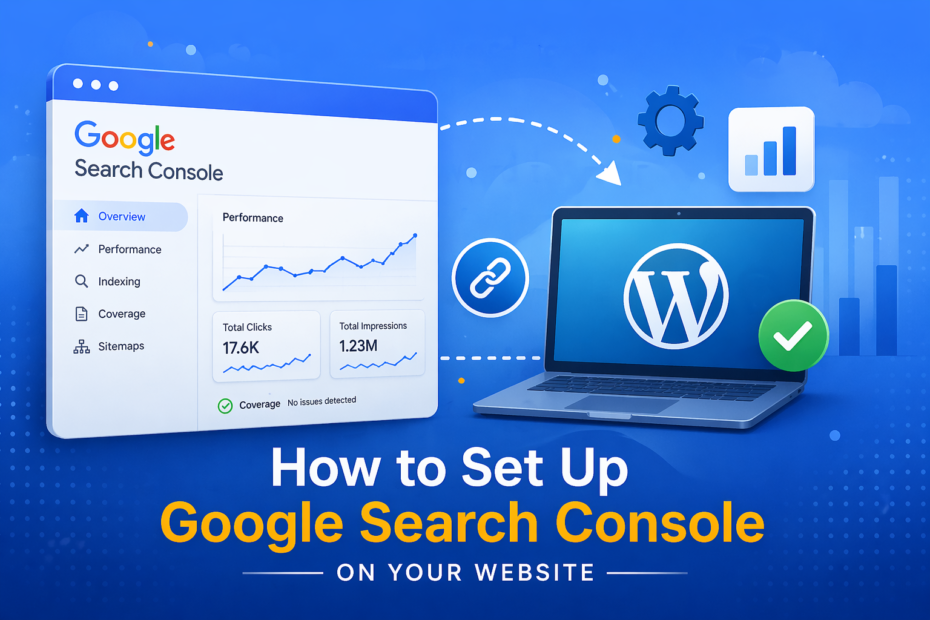
What is Google Search Console and Why Do You Even Need It?
Google Search Console is a free tool by Google. It is specifically for website owners and it shows you how Google sees your site.
With Analytics you see things like how many people visited and which pages they clicked. Search Console is a step before that. It shows you whether Google has even found your pages, which keywords people used to discover your site on Google, whether any pages have errors, and whether your sitemap has been read properly.
Here is why I needed it personally:
- I wanted to check if Google had indexed my new blog posts
- I was not sure if Google could even find livegodigital.com properly
- I wanted to see which search terms people were using to reach my site
- I needed to submit my sitemap so Google could crawl everything faster
One important thing to know upfront. Search Console is not connected to Analytics automatically even if you set up Analytics first. You have to set it up separately. That confused me initially because I assumed they would link together on their own.
What is Site Verification and Why Does Google Ask for It?
Before Google gives you access to Search Console data for your website it needs to confirm that you actually own the site. This step is called site verification.
Google does not just hand out data about any website to anyone who asks. If someone could open Search Console and look up data for any random website that would be a privacy problem. So Google asks you to prove ownership by doing something only the actual site owner can do.
There are a few ways to verify ownership and I tried most of them. Each one works in a different situation depending on how comfortable you are with technical steps.
Different Ways I Integrated Google Search Console into My WordPress Website
Before you jump to the specific methods, here’s a table to help you understand which method is easy and which is technical. So you know the right path to move ahead. However, as a blogger, it is my responsibility to tell you about all the methods that fit – so if one or the other fails in your case – you know which way to proceed.
| Method | Difficulty | Why is it ranked this way? |
| Google Site Kit Plugin | Very Easy | It’s a “point and click” process. As long as you can log into your Google account, the plugin does everything. |
| Google Analytics | Easy | If you already have Analytics running, this is a one-click verification. The only “hard” part is ensuring you are using the same Google account for both. |
| HTML File Upload | Moderate | It requires knowing how to use an FTP client (like FileZilla) or your hosting File Manager. |
| Manual Meta Tag | Technical | You have to find the <head> section in your code. It’s easy to accidentally delete a bracket or lose the tag entirely when you update your theme. |
Method 1: Using the Google Site Kit Plugin
This was the first thing I tried because I already had the Site Kit plugin installed for Google Analytics. Site Kit is made by Google itself and it handles multiple Google tools in one place including Analytics, Search Console, PageSpeed Insights, and more.
Since Site Kit was already active on livegodigital.com connecting Search Console was just a matter of a few clicks inside the plugin settings.
Steps I followed:
- Logged into my WordPress dashboard.
- Clicked on Site Kit in the left menu.
- Opened the Dashboard inside Site Kit.
- Saw that Search Console was listed as a product to connect.
- Clicked Connect next to Search Console.
- Signed in with the same Google account I used for Analytics.
- Approved the permissions Google asked for.
- Site Kit automatically verified my site and connected it.
That was it. No code. No file uploads. The plugin handled everything.
Pros: Easiest method if you already have Site Kit installed, no technical steps needed
Cons: Relies on a plugin which adds a dependency to your site
Method 2: Adding the Verification Meta Tag Manually
I also tried this method just to understand how it works. Google provides a small piece of code called a meta tag that you paste into your website’s HTML. When Google finds that code in your header it knows you own the site.
This method requires going into your theme files which feels scary at first but is actually simple once you know where to look.
Steps I followed:
- Opened Google Search Console and clicked Add Property and entered my website URL.
- Chose the HTML tag verification option.
- Copied the meta tag that Google gave me. It looked something like: <meta name=”google-site-verification” content=”xxxxx” />
- Went to WordPress Dashboard < Appearance < Theme File Editor.
- Opened header.php.
- Pasted the meta tag right before the closing </head> tag.
- Clicked Save.
- Went back to Search Console and clicked Verify.
It worked on the first try once the code was placed correctly.
Pros: No plugin required, lightweight and clean
Cons: If you switch themes later the verification code disappears and you have to do it again
Method 3: Verifying Through Google Analytics
This one surprised me because I did not know it was even possible. If Google Analytics is already connected to your website properly Google Search Console can verify your site through that existing Analytics connection. No extra code needed.
This works because Google already trusts the Analytics tracking code on your site. Using that same trust to verify Search Console makes sense.
Steps I followed:
- Opened Google Search Console and clicked Add Property and entered my website URL.
- Scrolled down to find the Google Analytics verification option.
- Made sure I was logged in with the same Google account connected to my Analytics.
- Clicked Verify.
Google checked that the Analytics code on my site matched my account and verified ownership automatically.
Pros: Fastest method if Analytics is already set up, zero code changes needed
Cons: Only works if Analytics is already active and connected to the same Google account
Method 4: Uploading an HTML Verification File
This method involves downloading a small file from Google and uploading it to your website’s root folder. It is one of the older methods but it works reliably.
I tried this on my hosting panel just to see how it goes.
Steps I followed:
- Opened Google Search Console and added my property.
- Selected the HTML file verification option.
- Downloaded the verification file Google provided. It had a name like google1234abcd.html.
- Logged into my hosting panel (cPanel or similar).
- Opened File Manager and navigated to the public_html folder.
- Uploaded the downloaded HTML file directly into public_html.
- Went back to Search Console and clicked Verify.
Google checked that the file was accessible at my domain and confirmed ownership.
Pros: Does not depend on any plugin or theme code, very stable long-term
Cons: Requires access to your hosting file manager which some beginners find unfamiliar
Common Mistakes I Made While Setting Up Search Console
These are the things that slowed me down and I think most beginners will run into at least one of them.
Using a Different Google Account
This was a test case – something which I did intentionally to find out the results to help you out. Just like with Analytics I initially tried to verify Search Console while logged into a different Google email than the one I use for hosting. The verification kept failing and I could not figure out why. Always use the same Google account for everything.
Pasting the Meta Tag in the Wrong Place
The first time I tried the manual method I pasted the verification tag after the </head> closing tag instead of before it. Google could not find it and the verification failed. The code must go inside the head section, not outside it.
Thinking the URL With and Without WWW Are the Same Property
They are not. https://livegodigital.com and https://www.livegodigital.com are treated as two separate properties in Search Console. I had to add both versions to get complete data. The easier fix is using the Domain property option when adding your site because it covers all versions automatically.
Switching Themes After Meta Tag Verification
I updated my theme once after doing the manual meta tag verification and the tag disappeared with the old theme. Search Console showed my site as unverified a few days later. If you use the meta tag method you have to re-add the code after any theme change.
Not Submitting a Sitemap After Verification
Verifying your site only gives Google access to your data. It does not tell Google where your pages are. I forgot to submit my sitemap for the first few days and Google was crawling slowly.
Go to Search Console < Sitemaps and paste your sitemap URL (usually something like yourwebsite.com/sitemap.xml) after verifying.
How I Fixed the Issues I Ran Into
Once I understood what went wrong, everything was straightforward to fix.
For the Google account mismatch I logged out of all accounts first, then logged back in using the correct email that was registered with my hosting and Analytics. Verification worked immediately after.
For the meta tag placement mistake I just opened header.php again and moved the tag to the correct position before </head>. Saved it and verified again.
For the theme change issue I switched to the Google Analytics verification method instead so the verification did not depend on theme files anymore. That was the most permanent fix.
After everything was correct I opened Search Console and submitted my sitemap. Within a day or two I could see pages being indexed and the first keyword data starting to appear.
Important Things to Remember Before You Start
- Use the same Google account that is connected to your Analytics and hosting
- The Domain property in Search Console covers www and non-www versions together
- Submit your sitemap after verification, do not skip that step
- Search Console data does not appear instantly, give it a few days
- If you switch themes and used the meta tag method you will need to re-verify
- Having multiple verification methods active at the same time is actually fine and Google recommends it as a backup
Conclusion
Connecting Google Search Console to your website is not complicated once you know which verification method fits your situation. If you already have the Site Kit plugin or Analytics connected the process takes less than five minutes.
The thing I wish someone had told me earlier is that Analytics and Search Console are two separate tools with two separate setups. Getting both working together gives you a much clearer picture of what is actually happening with your site on Google.
If you have already connected Analytics to your WordPress website – Search Console is the very next step. The mistakes are easy to make but every single one of them is fixable. If you get stuck on any part drop a comment below and I will help you sort it out.